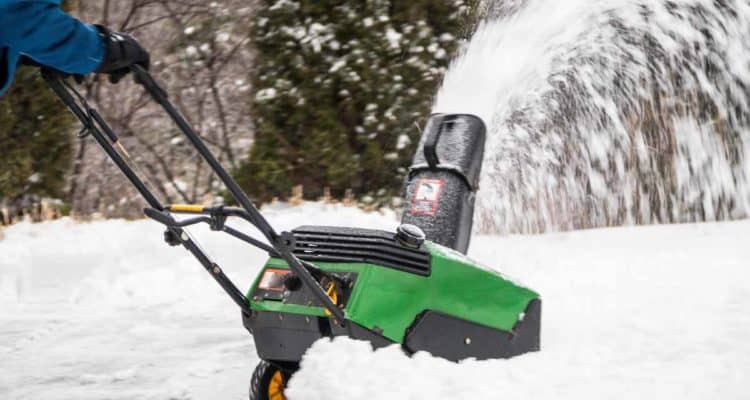
When the leaves start to fall and snow is on the way, it’s a great time to prep your snowblower for the Winter season. You don’t want that first snowfall to hit and find out your machine is not in working condition. In just an hour, you can prep your snow blower and diagnose any issues that may need repaired with the steps below.
If you are not comfortable or unsure of something, its recommended to have a professional look at it. Many repair shops offer pre-season specials for annual tune-ups.
1) Check for Damage
Take a minute to look over your machine. Make sure your auger, skids, and scraper are in good enough shape. Check that cables, handles, shear pins, and fasteners are securely in place. If you find excessive wear or damaged parts, order replacements and install them before the first snow hits.
2) Tighten Loose Bolts and Levers
 It’s a good idea to check bolts and screws for proper tightness. The vibration of the machine over time may have caused them to come loose. It is recommended to remove the spark plug to prevent any unintentional starting during this process.
3) Check Tire Pressure
Months of storage can do a number on your tires and its important that they are inflated properly before use. This ensures you don’t damage other parts and get the best possible traction in icy conditions. Most tires can be inflated using a standard bicycle pump. Your user manual should provide the recommended tire pressure. If you hate dealing with pneumatic tires, maybe it’s time to replace them with some airless tires.
4) Flip the Skid Shoes
If your snow blower has skid shoes (most two-stage snow blowers do), it’s a good time to flip them if there is wear. Most skid shoes are reversible. And if you’ve already done this, it might be time to purchase some replacement ones before the season starts. They are relatively easy to install.
5) Inspect the Belts
Check for excessive wear or cracks on the belts. If you find some, it is time to replace them. Sears recommends snapping a picture of the belts before replacing them so you’ll know exactly where they go.
6) Fill the Gas Tank
 You should have drained the gas tank before storing your snow blower away in the Spring. Or at least put in a fuel stabilizer.
If you’re like many people, you didn’t do this. But fear not, you’re still probably OK. Take a turkey baster or plastic tube and siphon out as much old fuel as you can. Old gasoline can gum up fuel passages and the carburetor. After getting as much as you can out, top off the tank with fresh fuel that will mix in with the remaining old gas. This should be enough to avoid a problem. But next year, drain that fuel before putting the snow blower away or add some approved fuel stabilizer.
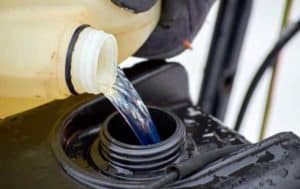
7) Check Oil
Take out the dipstick and look to see how clear the oil is. If it’s dirty, it’s time for an oil change. Check your manual for the proper way to drain the old oil. Most models have a drain plug on the back and requires tilting the machine. Make sure you dispose of the old oil properly (your town likely has a drop off). Then fill it up with fresh oil of the proper type and grade.
8) Install a New Spark Plug
Checking your spark plug at the start of the season is always a good idea. If there are signs of rust and corrosion, it’s time for a replacement. If it’s just dirty, maybe it just needs a cleaning. Spark plugs are cheap so don’t mess around too much trying to save an old one.
9) Spray the Discharge Chute
To prevent clogging, you’ll want to spray down the discharge chute with something. Many people have success with WD-40, cooking spray (my choice), or silicone. Some companies sell specially made snow repellent sprays too. Those tend to be too expensive in my opinion.
10) Start Your Snow Blower
With everything in place, it’s time to test your machine out. Let it run for a few minutes and check for any odd burning smells or unsettling noises. If all goes well, you’re ready to tackle the Winter.
Now that you’ve finished preparing for the Winter, it’s important to keep in mind our tips for maintaining your snow blower through the Winter. And of course our guide to putting a snow blower away for the season.